If you have tried foam rolling and walked away thinking it does nothing, there is a decent chance the problem is not your effort. Plain high-density foam rollers work reasonably well on large, cooperative muscle groups like the quads. But four areas give almost everyone trouble: the IT band, the thoracic spine, the calves, and the hip flexors. These spots are either too sensitive to tolerate sustained pressure, too structurally awkward to position correctly, or they simply do not respond until you get some kind of signal into the tissue beyond just bodyweight load. That is where technique, sequencing, and tool choice all start to matter. The fix that worked for me was switching to a vibrating roller, specifically the Therabody WaveRoller, and changing how I used it.
I started using a vibrating foam roller on these four trouble spots after about two years of inconsistent results with a standard grid roller. The difference was not subtle. Vibration adds a neurological input that plain rolling does not offer. The muscle perceives the oscillation and relaxes faster, which lets you sink into the tissue without the white-knuckle wincing that usually makes people cut sessions short. This guide walks through the exact approach I use, step by step, with timing and positioning notes that took me a while to dial in. If you want to follow along with a dedicated tool, the Therabody WaveRoller is what I use and recommend, but the mechanics apply to any quality vibrating roller.
Tight spots that do not respond to a plain roller often respond immediately to vibration
The Therabody WaveRoller has five vibration frequencies and a 2.5-hour battery that handles multiple sessions per charge. It is currently available on Amazon with free Prime shipping.
Amazon Check Today's Price on Amazon →Before You Start: Two Things That Change Every Session
Most people grab the roller, put it under whatever hurts, and roll back and forth until they give up. That approach misses two basics that make a real difference. First, sequence matters. You want to start distal and move proximal, meaning start further from your core and work your way in. Calves before hamstrings, thoracic spine before lower back. This allows the nervous system to warm up to the compression before you get to the areas that need more attention. Second, speed matters. Rolling fast is almost useless. Aim for two to three seconds per inch of travel. Slow is what lets the tissue respond.
With a vibrating roller, you have an additional dial to consider: frequency. Lower frequencies (around 20-30 Hz) work better for sensitive areas and warm-up rolling. Higher frequencies (40-53 Hz) work better for deep tissue work on larger, less reactive muscles. The WaveRoller's five settings let you adjust this on the fly. Starting at setting 2 and bumping to 4 once a spot softens a little is the pattern I have settled into for most sessions.
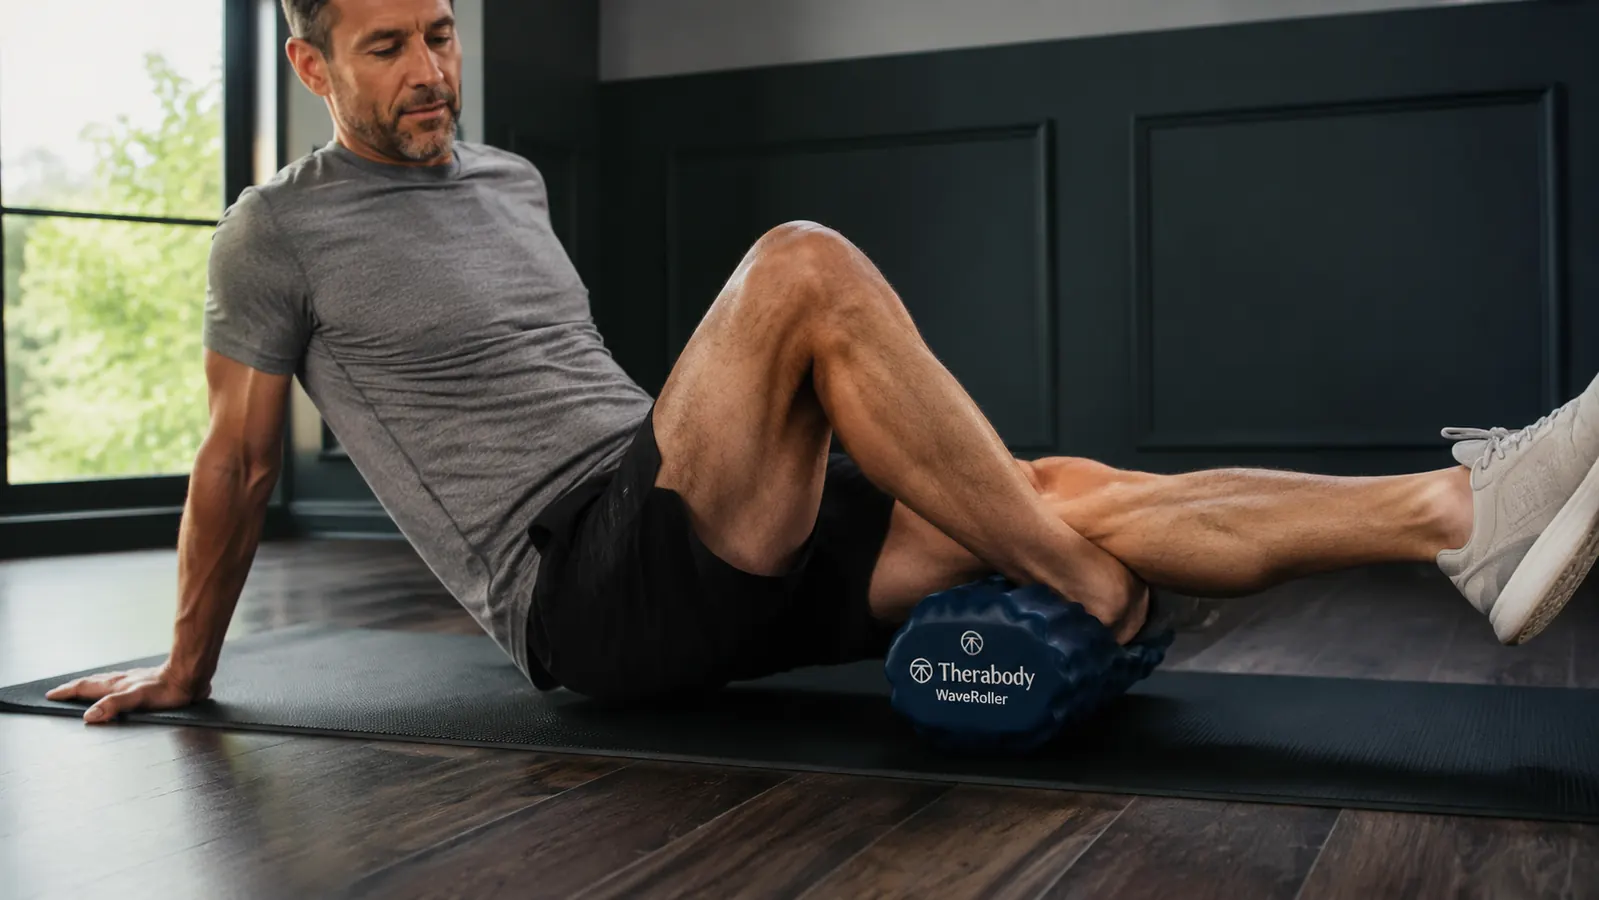
Step 1: Calves (2 minutes per side)
Calves are the most underrolled muscle in the lower body for runners and cyclists, and arguably the most impactful. Tight calves pull on the Achilles, contribute to plantar discomfort, and limit ankle mobility in ways that ripple all the way up into hip position. They are also awkward to roll well with a plain roller because there is not much mass to load and the position feels unstable. Start here.
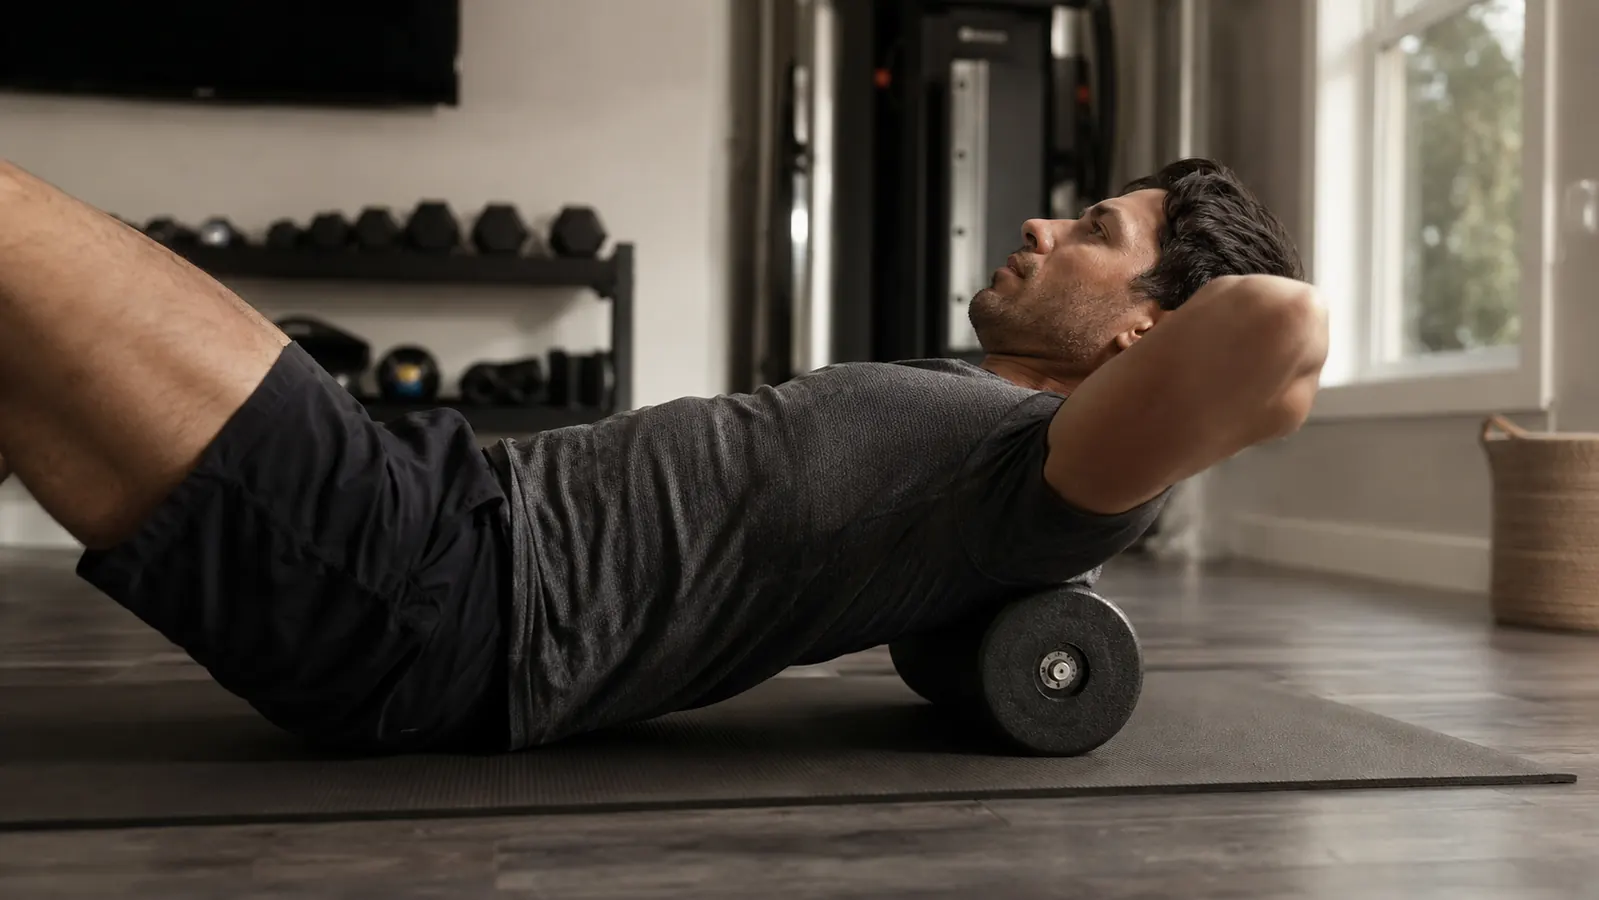
Sit on your mat with your legs extended. Place the roller under your right calf, just above the Achilles, and put your left ankle over your right for additional weight. Your hands should be flat on the mat behind you, arms fairly straight. Set the vibration to level 2. Now roll slowly from just above the Achilles up toward the back of the knee, pausing for a full three count wherever you feel density or tenderness. When you find a spot that resists, stop there and flex and point your foot three times before moving on. This active movement during sustained pressure is the single fastest way to get a calf to release. Two minutes per side, working the outer and inner portion of the calf by rotating your leg slightly.
A note on pressure: if you are wincing through it, back off. The nervous system responds to pain by tensing, not relaxing. You want pressure that is firm enough to feel meaningful, but not so aggressive that you are holding your breath. Think 6 out of 10 on a discomfort scale, not 9.
Step 2: IT Band (90 seconds per side)
This one deserves a straight answer about what foam rolling the IT band actually does. The IT band itself is a thick fibrous structure with little ability to stretch or compress. What you are really working on when you roll the outside of your thigh is the tissue around the IT band: the lateral quad, the TFL at the hip, and the biceps femoris at the knee. Rolling directly on the most painful point of the IT band typically produces discomfort without much benefit. Slightly anterior (toward the front of the thigh) and slightly posterior are where the real work happens.
Lie on your side with the roller under the outer part of your right thigh, positioned about mid-way between the hip and knee. Stack your left leg on top, or place your left foot flat on the floor in front of you for a lighter load. Set vibration to level 3. Roll a two-inch window, forward and back, just anterior to the seam line of your shorts. Then shift slightly posterior and repeat. Do not try to barrel through the whole outer thigh in one long pass. Work the three zones separately: lower third (above the knee), middle, and upper third near the hip. You should feel the vibration doing most of the work for you. This takes 90 seconds per side and produces better results than five minutes of aggressive rolling on the same spot.
Rolling directly on the most painful point of the IT band rarely helps. The tissue around it, slightly forward and back, is where the release actually happens.
Step 3: Thoracic Spine (2 minutes)
The mid-back, specifically the section between roughly the bottom of the shoulder blades and the top of the rib cage, is where most desk workers and overhead athletes carry a significant amount of stiffness. This is the thoracic spine, and it is genuinely one of the better areas to use a foam roller on because the natural curve and rib structure give you built-in feedback about where you are working.
Sit on your mat and lower your back onto the roller so it sits across your mid-back, just below the bottom tip of your shoulder blades. Cross your arms over your chest (do not clasp your hands behind your head and pull on your neck). Set vibration to level 2. From this position, lift your hips slightly off the mat so there is some load through the roller. Hold here for a count of five. Then bump the roller up two inches and hold again. You are working segment by segment, not rolling back and forth. Each hold should feel like a gentle extension over the roller. If a segment feels particularly stuck, add three slow diaphragmatic breaths while maintaining the hold. Exhaling completely on each breath will often let that segment extend a little further than the breath before it.
Avoid rolling the lumbar spine this way. That area is structurally different and does not respond well to extension over a roller. Stay at mid-back and above.
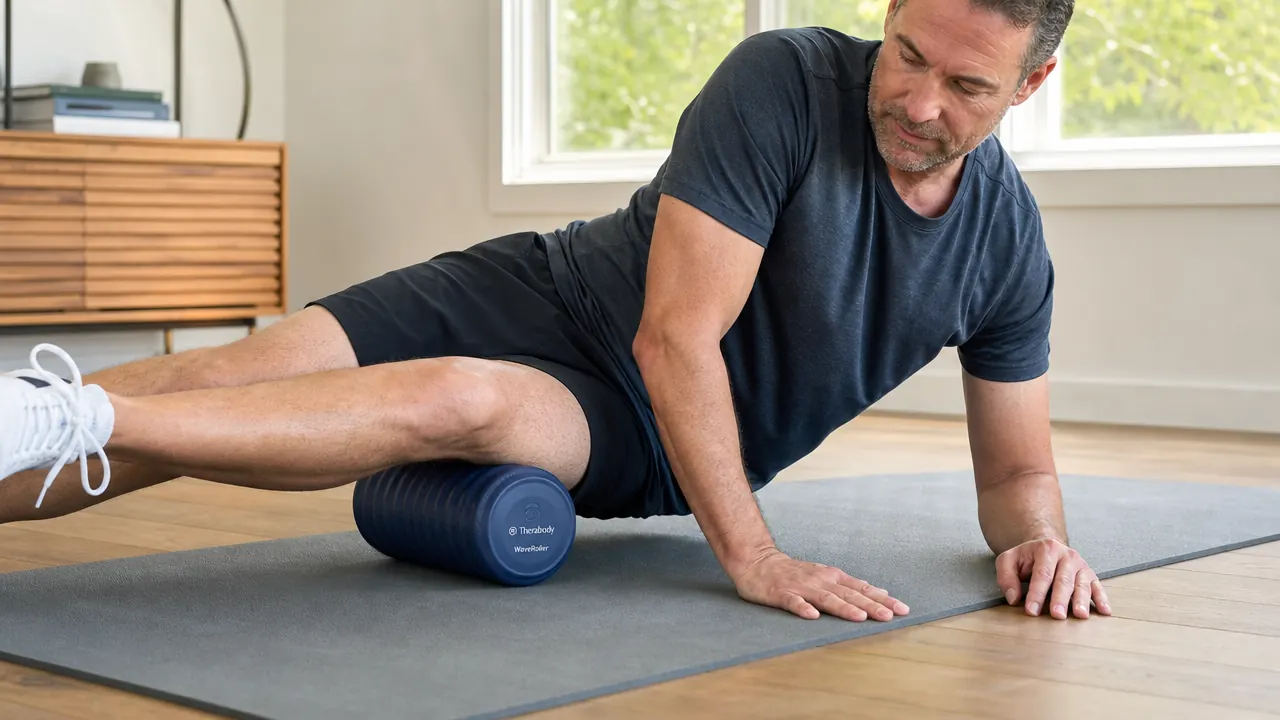
Step 4: Hip Flexors (90 seconds per side)
Tight hip flexors are responsible for a large share of lower back tension in people who sit for long portions of the day, even very active people who train regularly. The psoas and iliacus run from the lower lumbar spine through the pelvis and attach at the inner top of the femur. Direct rolling of the psoas is not something most people can achieve without discomfort and it is not necessary. What you can reach effectively is the TFL (tensor fasciae latae), the rectus femoris at the top of the quad, and the attachment area just below the anterior hip. Together, these three areas produce most of the pulling sensation that people associate with tight hip flexors.
For this one, you will be face down. Place the roller under the top of your right quad, angled slightly inward so it is closer to the front of your hip than the center of the thigh. Set vibration to level 3. Support yourself on your forearms like a sphinx position. Now slowly slide forward over the roller, working the top six inches of the quad and the pocket just below the hip bone. When you find a tight spot, hold your position and drag your right knee out to the side and back a few times, like you are trying to butterfly the leg. That small movement creates just enough relative motion in the tissue to accelerate the release. Do 90 seconds per side before moving on.
Step 5: Cool Down and Reset (2 minutes)
Finishing a rolling session with two minutes of light movement is not optional if you want the work to carry forward. After rolling, the tissue is more pliable and the nervous system is in a slightly more receptive state. Using that window for gentle active range of motion, not stretching for length but simply moving the joint through a comfortable range, reinforces what the rolling started. For calves, a slow heel raise and lower. For the IT band area, a standing hip circle. For the thoracic spine, three slow shoulder circles each direction and a gentle cat-cow on your hands and knees. For hip flexors, three slow hip hinges combined with a gentle reach overhead.
Total time for the full sequence: about ten minutes when you include setup and transitions. That is a realistic commitment most people can maintain multiple times per week. Consistency matters far more than duration. A ten-minute session four times a week will outperform an hour of occasional, aggressive rolling every time.
What Else Helps
Foam rolling works best as part of a recovery stack, not as a solo intervention. A few things that consistently pair well with this sequence: hydration before and after (tissue that is slightly dehydrated is less pliable, which is why morning rolling often feels harder), at least five minutes of light movement like walking or dynamic warm-up before you start if your muscles are completely cold, and heat applied to chronically stuck areas for 10-15 minutes before rolling if you are dealing with long-standing tightness rather than post-workout soreness. Heat before rolling is a combination that works; ice after rolling is appropriate for acute inflammation but should not be routine before a technique session. For sessions focused on recovery after training, rolling within 30-60 minutes post-workout captures the tissue while it is still warm and more responsive.
If you have been dealing with one area that simply does not respond despite consistent rolling and technique adjustments, that is a signal worth taking to a physical therapist or sports medicine provider. Rolling is a maintenance and recovery tool. It is not a substitute for assessment when something is genuinely not improving over several weeks.
Ten minutes and the right tool covers the four muscles that never cooperate with plain rolling
The Therabody WaveRoller (ASIN B08HW7GXSQ) is a high-density vibrating foam roller with five frequency settings, a travel-friendly size, and a rechargeable battery good for multiple sessions. It is the tool this protocol was built around.
Amazon Check Today's Price on Amazon →